Thursday 27 June 2013

Ripped Cheek

Ripped Cheek

Never done this before, or this detailed so today I decided to try it out.
This was seriously the easiest thing I've ever made and probably the best cut I've ever made..
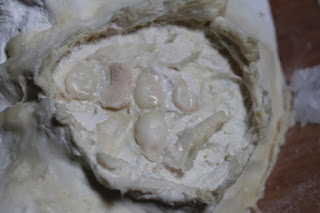
I made it on a life cast I did months ago and made the ripped cheek with latex, tissue paper and cotton balls.

This is a little bit of the process to how it was made.
Not much because I kept forgetting to take photos as I was enjoying making it haha


Now its ready to take off and place onto the face, adding a lot of blood but not that much to hide what you've made underneath. 

Wednesday 26 June 2013

The Joker/Harley Quinn


The Joker

Character makeup
I've never actually done a lot of character makeup before, not even sure if I've ever done one to be honest.. But I decided to create The Joker because he is simply amazing.. haha

Products:
Classic colours Snazaroo - White
Classic colours Snazaroo - Black
Classic colours Snazaroo - Bright Red

And I did use Ben Nye, nose & scar Wax but I failed at it as I've just started using the product today so I'm not really good at it yet.. 


Also did Harley Quinn on the other side of my face
I like them both together, I'm utterly obsessed with both Joker and Harley Quinn so this design will of course be my Halloween makeup <3  


Tuesday 25 June 2013

Missing Finger Tip


Missing Finger Tip

I had seen a tutorial on something similar to this and I decided to try it out because why not..
I didn't have any wax or anything that the person was working with but I did find just a normal clay, Super Sculpey, I believe was the name of the product. It had a skin colour look to it so I just grab the clay and went on to create the shape I wanted. I didn't use anything to stick it on with, I just placed it on my bent finger and sculpt it onto my finger.
  

It didn't turn out that great in person, you could see in the photo below but with more blood and a lot more detail, it could work out. I added a little foundation to blend in most of the clay but nothing else. This was only because I was seeing if I could make it so an experiment rather than a final piece. 


You can see that my finger is bent and the clay is built on top so if you're going to scare people just remember to keep the right angle and just show the front haha


I'd have a lot more blood onto the finger, coming down the length of the finger and maybe make another piece of just the finger tip. I think it'd look awesome with both pieces together and I might try document how to make it all.


And yes, my jammies are awesome.. haha
Homer Simpson! Woo 


Monday 24 June 2013

Skeleton and Ventriloquist

Old Designs

I haven't been doing much makeup designs as I'm ordering brand new products which will hopefully be coming this week. I thought I'd update a new post anyway and found these old photos/makeup designs that I did a while ago. They aren't that great but there pretty simple.


Skeleton Design.

I seen a lot of complicated Skeleton makeup looks, so I decided to see if I could do a much quicker look and make it very simple. The only products I used in this design was a black eyeliner pencil and just a black Eye-Shadow for over the top. It's not really that great of a design and would most likely change what I did if I recreated this look. 

I would have added a lot more detail and maybe whitened the face a little bit. For someone that is rushing around on Halloween or just wanting a very simple look for Halloween. I'd go for something like this, as its still a little scary yet easy to do.


Had a little fun with editing and really liked this photograph haha


Ventriloquist Dummy.


An old makeup look that I did a while back, not sure if I like this one but again it is simple and easy to create. This took me roughly 10 minutes or less :)

I believe I only used four products for this look. 
Eyebrows - Black eyeliner pencil
Eyes - Black eyeliner pencil and Black Eye-Shadow reaching to the brow
Also contouring the nose with the eye shadow
I placed the brightest pink blusher I had, over the apples of my cheeks. 
Lips - A soft pink lipstick making a heart shape
And a line going down from both sides of the mouth and around the chin, which I used the black eyeliner pencil. 


Hopefully I'll be making more Special Effects makeup or Character makeup sometime this week. 

Wednesday 19 June 2013

My Joker version?


Practicing special effects onto my face for the first time. It was done with: 
  • Latex
  • Tissue Paper
  • Tomato sauce... I had no fake blood :(
I like this one, reminds me of my favourite villain. THE JOKER! But I think it might be because I have green hair.. haha I was going for a pretty look but I don't seem to manage to keep that in mind.. Got told the eyes remind them of a Tim Burton character, that made me happy :3 As I'm slightly in love with Tim Burtons art.

Its a pretty simple look, green/black eyes.. Lines down the mouth then cuts over the cheeks. I'm thinking about doing a step by step look but I'm unsure.  

I wouldn't recommend using tomato sauce, it smells and feels horrible :| Plus it doesn't look realistic haha


Exhibition Time.


Exhibition Time

My last exhibition at Borders College, two years completed. 

At the start of college I'd never expect my exhibition to be looking like this, as I was never into makeup and never really tried horror makeup. Not even for Halloween. Drawing was one of my main subjects that I'd work on and it's what I'd do best but somehow over the two years, I became fascinated with makeup.

And I love it.   


I did feel my exhibition was a little to bunched up together and would have wished for a little more space, like everyone else had but oh well. I was more happy that I had stuck into the final year of college and found something I love to do.


Three different ways that I expressed my makeup designs. 
The cast faces, I am happy with them but I felt that I choose the wrong media and wished that I had instead made a lot more photographs. Designed clothes and backgrounds ect. But then again, I did learn a lot from casting my face and I am happy with the result. I believe I had 7 months which seems long but having two other Units and learning from the start, it was very difficult to do.


Monday 17 June 2013

Paper Making

BTEC Art and Design, 2 year College course that I have just finished. Thought I'd share some of the work that I had created while I was there. 

Paper Making and Print Making Unit

This had to be my favourite unit that I was given, it just seemed so different and it was great fun to make the paper. I'd never done this before so it started off pretty messy and wrong. The only thing that I don't like is waiting to see the result, letting the paper dry. We had to leave it on a board somewhere in the class room so it took roughly about a week for the paper to dry. I'd recommend doing paper making though! :)

I got a task sheet at the start, like every other unit. This was the main task:
The Crafts Council is planning an exhibition that demonstrates the versatility of paper as an art form. They are looking for works that push the boundaries of handmade papers – artists’ books, structural forms, assemblages – the Council wishes to promote works that move away from the traditional idea that paper is merely a support/ carrier for other media, and is asking for works that combine papermaking and printmaking in an innovative fashion. There are no size constraints on works submitted.

I wanted to make something very simple, like a book! So that is what I did.. Only once I got close to the end, I realized it was the simple after all. When paper making, you need to learn to make the pulp loose so it isn't thick. I made that mistake..

I decided to create these hangings instead, with stitched in photographs from my makeup designs and then with Alice in Wonderland and song lyrics to finish it off. To be fair, I actually prefer this layout more than what my book would have turned out like.


I decided to add coffee splashes and mug stains to the paper which was inspired by Alice In Wonderland, the Mad Hatter. I thought it went well with the colours in the paper. 


Cutting throw the paper to see what it'd look like, thought it looked pretty cool. 


Embedding photographs into the paper, this was something I was going to do a lot of but the time and difficulty of having to embed photos on both sides seemed to difficult. I did find that it looked great and I might go back to doing something like this again. 


This was a part of my final, cut throw the paper and added photographs. Similar to a photo frame, as I added a back piece to hide the back of the photograph.  


These are just a few bits from my Unit, I might add more later and maybe some other art work that I did on the course. 

Saturday 15 June 2013

Making a fake cut? Special Effects.

Step One - 
Placing latex over the arm and building up small parts of tissue paper on the top.
Four to Five layers will do.
Note: If your putting latex over any parts of hair, it WILL hurt when taking it off.


Step Two -
I placed brown eye shadow underneath but after I just placed red and black face paint over the top so I'd just create the cut with the face paint for a better effect.


Step Three -
I placed bruising at the side of the cut, just to give it a better effect but this depends what you are creating the cut for. I do feel that the bruising that I did, is slightly over the top but this was the first ever cut that I had created haha


 Step Four -
Add some FAKE BLOOD! It makes it more real looking and creepy haha


Step Five -
You don't have to do this part but I added some safety pins to my cut
Just to see what it was like... haha 


Special Effects - Cuts


Having fun with Special Effects
First practice with creating a sliced arm.
Done this arm with:
  • Latex
  • Tissue paper
  • Foundation (That matches your skin colour)
  • Red and Black face paint
  • Fake Blooooood


I done this at college, liked seeing people freak out haha


Damn blood! Was going everywhere..


Anyway the reason I was doing this cut was for one of my College Units, Show Racism the Red Card. http://www.srtrc.org/
I was researching about how Racism hurts people ect and decided to create a fake cut and place some Racism comments into the cut but my Tutor thought about another idea which I preferred if I'm honest. 

This is my Final Idea.


Some facts on Casting a Face!

There is lots of Websites that you can find out 'How to make a face cast' So instead of writing out each step, I've decided to write out what I realized, some facts and overall what I learnt while doing these castings. 

Step One: Mixing the Alginate and water together.

If you've never worked with alginate then I'd start with casting you're hands or feet. Something simple and easy to work with just till you get used to working with the alginate. It's pretty hard to work with and you have to quickly place it onto the face as it dries very fast. 
I would start with the nose. Fact: I wouldn't place anything in the nose like straws ect. In case you knock it which will cause damage. I left it alone and you can breath fine :) Starting with the nose is much easier because then you can just place the alginate over the rest of the face once the alginate on the nose has been placed gently around the nostrils and making sure the model can breath. 
*Remember to have vaseline all over the hairs on your face because once the alginate touches it, OUCH! Its a pain to get off.

                                              Step Two: Placing Mod Roc onto the alginate. 

Start with the nose again! This means by the time you've finished placing the mod roc over the alginate, the nose will be the hardest built which is good because the nose is more fragile when taking it off you're face. 
I'd place maybe 3-5 layers of mod roc over the alginate so that its kept in place. 

                                                             Step Three: The Mold

The nose, its always the problem. I find this part the hardest, having to fill in the nostrils. 
I don't really have an easier way to doing this as I've not mastered it yet. The technique that I do is pretty bad so I'll just keep quite about that...

                                                               Step Four: The Casting

I placed a box underneath so that it was straight and easy to fill in the cast. 
I made roughly 5 cups of the casting power/water mix and filled in the mold each time one cup dried. If that makes sense.. I place one cup mix into the mold then waited till it dried and made another cup full and then continued till it was full.. I can't explain it haha
The easier way would just to make a massive mix then place into the mold but remember to get every detail so shake it a little and keep the back of it flat. 

Thats pretty much how I made all 15 face casts haha


Face Castings

Face Castings

I made about 15 cast faces which took me about a week to do then another 2 weeks for them to dry. These are a few finished designs I made for my Final Major Project, my final unit for College. From fifteen cast faces I decided to just have eight final pieces with each having a meaning. I was inspired by Tim Burton and my other units I did at College with my makeup designs, I quoted a lot of Alice in Wonderland and joined them to how I felt and connecting them to the face.


"Controlled"


"Smile"


"Beauty"

I'm not a person to be seen smiling every second of the day which led me to be inspired by people coming up to me and saying "Smile Amy". Each of the eight faces have a different smile placed onto their faces.


Friday 14 June 2013

Made a nose!

14/06/2013

So I've finished my two years in College, yeey! Only I have nothing to do now so I decided to make a nose. I'm not sure why or how this came into my mind but it did so I went with it haha

I already seen a tutorial on how to make a nose a while back so I pretty much knew what I needed.

  • Latex 
  • Clay
And that is all. I grabbed the only clay I had which was: SuperSculpey, oven-bake clay in Beige and quickly made a nose shape. It never took me long roughly half an hour or less, depends how well you can handle the clay and the shape/size of the nose you are wanting. You don't need to harden the clay, I just placed the latex on top. It takes about roughly 6-7 layers of latex. I'd leave it to dry over night.

I used latex to place it onto my nose, carefully near the eyes. I also many times, cut and shaped the nose till it fit perfect onto my nose and hopefully it works! :3 One side of mine never so I decided to add a cut that I had created the night before. The colour of the latex is a yellow tinge so you need to work out how to get the right colour. For me, I just went for white facepaint as that was the easier way. 

It was my first attempt at making a nose and I think that it turned out pretty well :)


Thursday 13 June 2013

Alice in Wonderland

November 7th 2012

Alice in Wonderland Inspired.

This face was a lot complicated than others I have created, inspired by the Cheshire cat in Tim Burton's Alice in Wonderland. 

This is one of my favourite makeup design I have created from make-up. This photo has been edited but just the lightening, making it darker as I felt it fit. 

Products: 
AVON, COLORTREND - Black eyeliner pencil
RIMMEL LONDON - Black liquid eyeliner 
Pink and Black eye-shadow 
(Dark pink eye-shadow or red)
BB Cream, GOSH - Foundation, Primer, Moisturizer
And a GLUE STICK :P
(For covering the eyebrows to make new shaped eyebrows)


Makes pretty good photos when you shake you're head too haha